Houdini Car Rig
VFX Practice
2025
CHALLENGE
Become familiar with Houdini's interface as a first-time user by learning how to manipulate a pre-made car rig and sim system.
Software Learning
This project was tailored specifically as a learning experience to become acquainted with Houdini, a DCC with powerful simulation and scene layout capabilities, on top of a robust node-based workflow. In order to familiarize myself with Houdini without getting too overwhelmed by the software's limitless potential, I focused on pre-made assets and node setups for this project.
My goal was to manipulate a pre-made car asset with a car rig, along with a dirt and mud simulation tool that was provided to me, in order to create a short yet visually stunning animated video. My personal learning outcomes had less to do with the final result itself, and more with what I learned about the software along the way.
Car Model
The car model used in this project was a 1957 Jaguar XKSS purchased from Wire Wheels Club. The model was taken into Houdini and disassembled into several separate parts, which helped accelerate the process of applying all the individual textures to each piece. To ensure that the whole model and its newly placed materials were looking good, I rendered a turntable before proceeding with animation.
Car Animation
In order to ensure the car's motion felt grounded in real-world physics, I used Houdini's RBD Car Rig tool to animate the car using realistic controls that mimicked real vehicle inputs. The tool included options for suspension, bounciness, friction, and many more elements that gave me tight control over the car's movement path.
The most notable setting in this rig was the steering wheel's angle. Tuning this slider left and right caused the car's front wheels to turn accordingly, meaning the slider replicated the same effect as turning an actual steering wheel in the car. It was insanely fun getting to control the car's animation in this way, almost as if I was playing with an RC toy car!
Once I was happy with the car's motion path, I experimented with different camera angles to get a variety of perspectives for the same animation. My supervisor preferred the fourth, so I continued with this angle.
Dirt & Mud Simulation
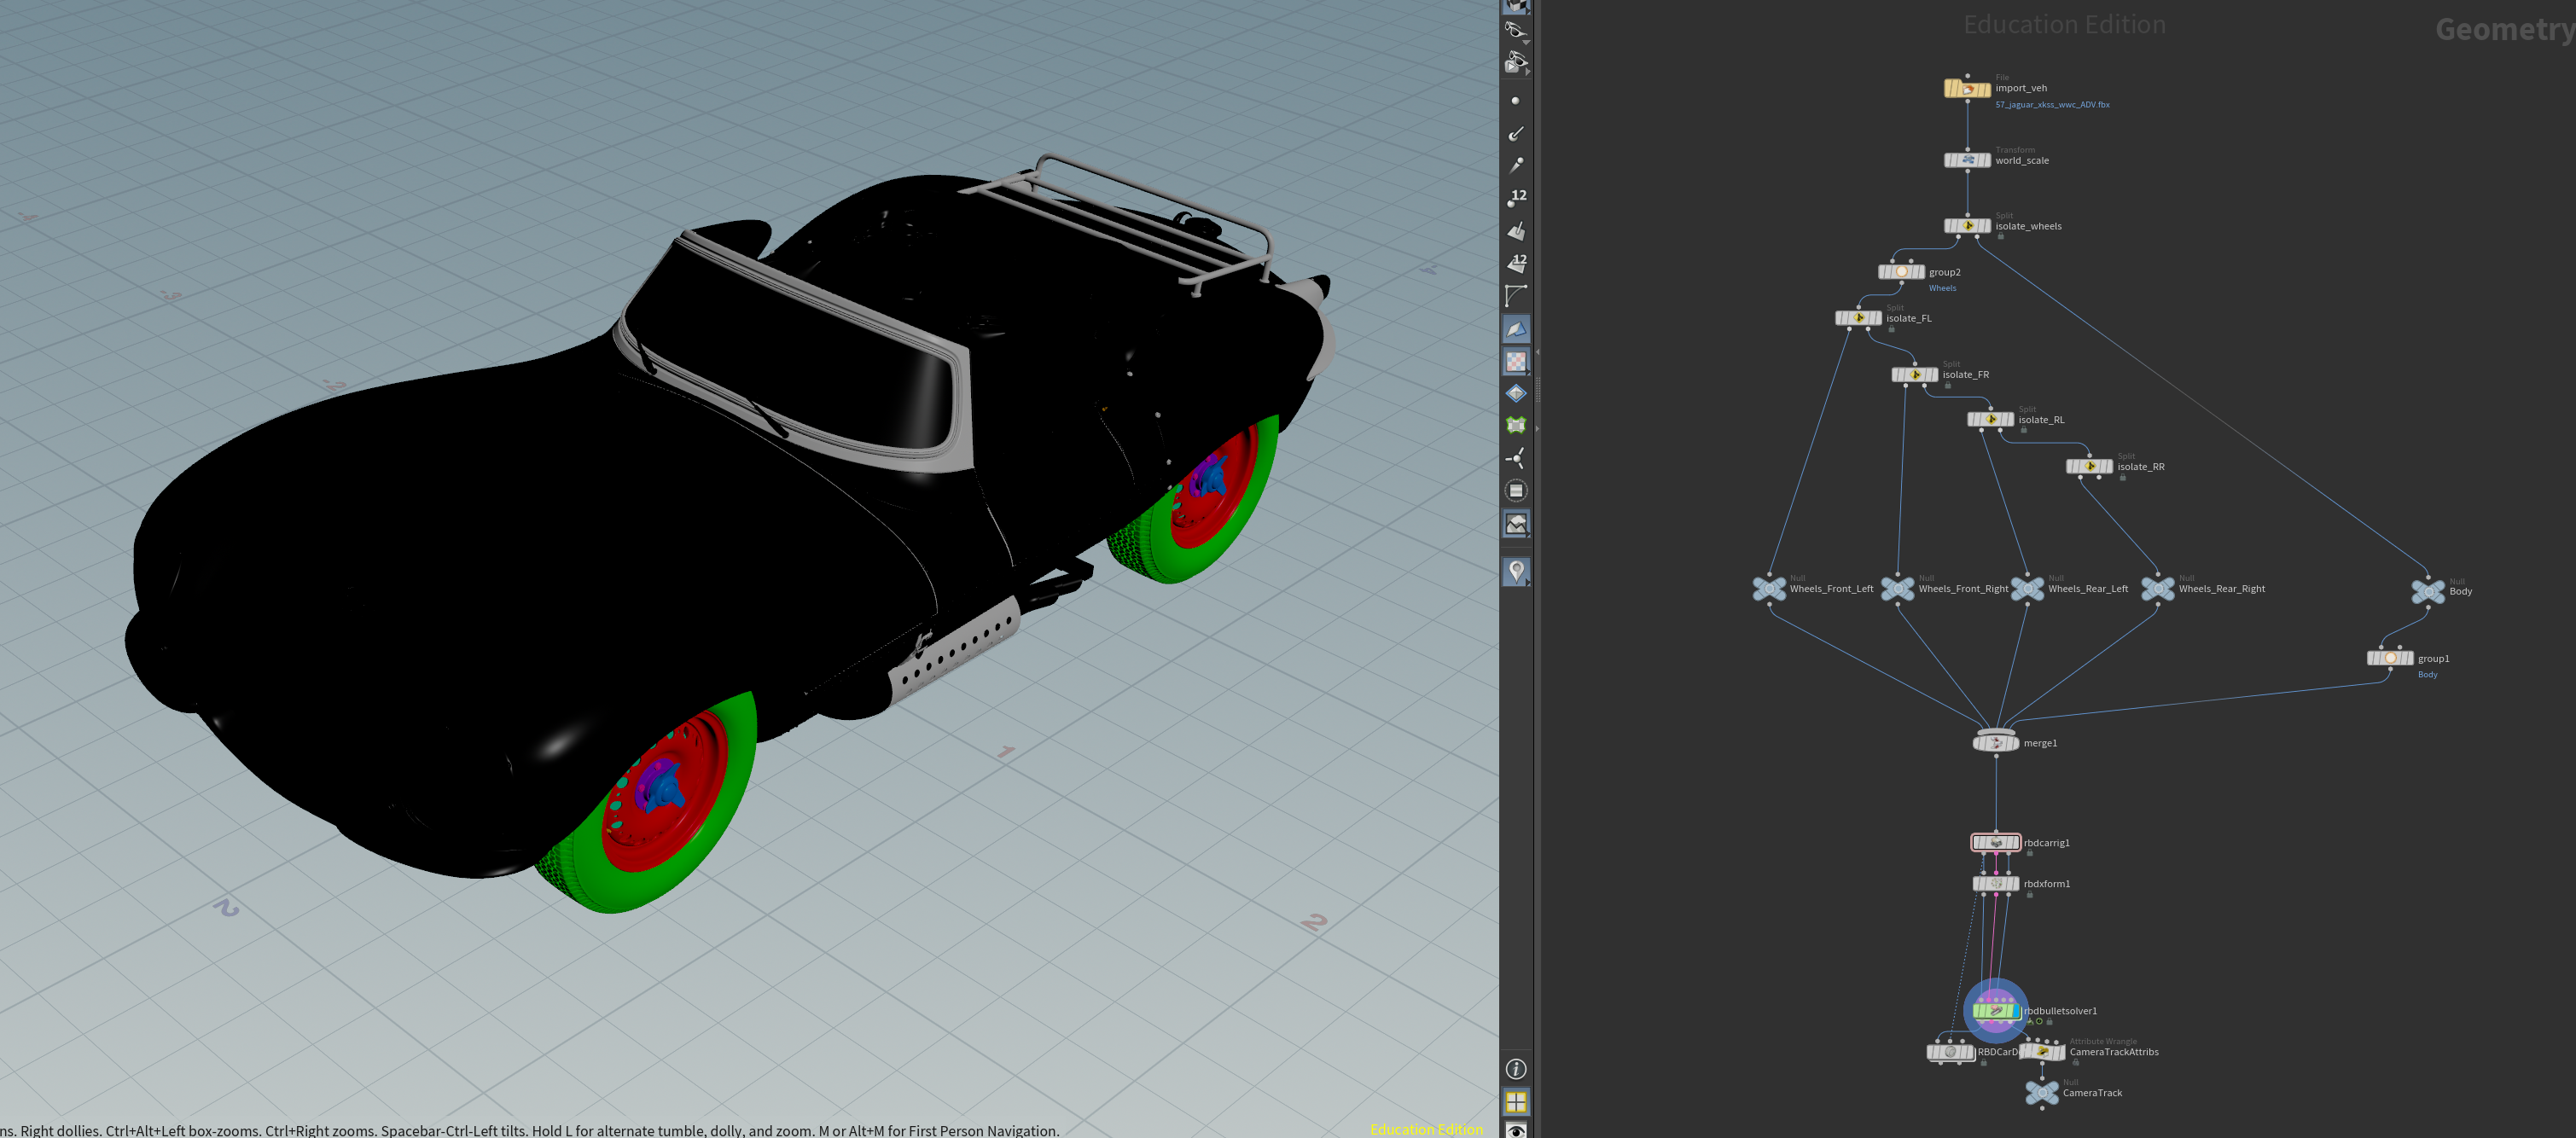
After the animation was locked down, I moved on to applying the simulation system. I used a pre-made node setup made by an experienced Houdini artist, which was designed to add dirt and mud that would dynamically respond to the car's movement. By using this system, I was not only introducing myself to yet another layer of features within the software, but I was also giving myself the opportunity to analyze and learn how a professional prepared a file with a robust simulation workflow.

Once I adjusted all the nodes and integrated my own car model into this system, I began the process of caching all the separate simulations that would comprise the particle effects. At this stage, I noticed some of my cached sims behaved erratically, with bits of the dirt and mud blasting off the wheels. At this point, I decided not to worry too much about it, especially since I believed the motion blur later on in rendering would most likely hide these awkward flecks, so I ignored it and moved on.
Scene Layout
The ground plane for the environment is made up of slight bumps that were generated with a noise pattern via VEX code. All the tree models were pre-made assets that I acquired from the previously mentioned Houdini artist, and I scattered them across the ground plane using point SOPs. Finally, the entire scene was lit with a simple HDRI.
Final Render Issues
All that was left at this stage was to render each frame and then pass them through After Effects as a sequence to export the final video. However, when I returned to the PC and checked through the rendered images, I noticed a glaring issue: the awkwardly fast parts of the sim were still showing even through the motion blur, and the puddles were having a weird glitch that was probably related to the same motion vector data that the car was providing to the overall motion blur effect.
Unfortunately, I didn't have the Houdini expertise to know exactly how to fix this issue, and either way there was too little time left before the final deadline to wait for the frames to render again. My solution to this visual bug was to significantly tamper with the frame sequence in After Effects. I masked, duplicated, and froze big chunks of the comp to try to hide the jittery errors as much as possible. On top of this, I also added the finishing touches to the video, such as audio and a slight camera shake.
Full Breakdown
check out my other work!